BioLet, a composting toilet that works with Nature!
-
BioLet composting toilets are designed to unite the natural composting process with advanced technology which accelerate and optimize biological decomposition, evaporating excess liquid and exhausting odors… all within an elegant bathroom fixture that is easy to use and economical to operate.
-
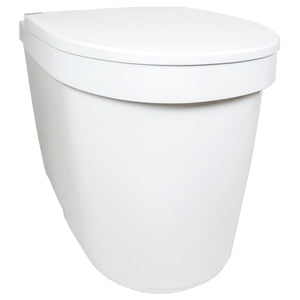
BioLet is a self-contained biological toilet that composts waste, toilet paper and evaporates liquid.
-
The composting process takes place using nature's own microorganisms, without the need of any chemicals.
-
Controlled air supply and heat, as well as regular mixing of the compost accelerates the composting process and converts toilet waste into eco-friendly humus. This produces a nutrient rich supplement for your garden.

-
BioLet toilets are designed as closed-system, fully automatic electric toilets that anticipate your every move! Sitting on the toilet seat opens the trap doors, while closing the toilet seat lid activates the stainless steel mixing mechanism that efficiently breaks down paper and distributes moisture into the compost material in the upper chamber. Material in the upper chamber is finished in the lower chamber and eventually emptied.
-
The BioLet 65 model features LED maintenance indicators to let you know when it is time to empty the lower chamber. The non-composted portion and the dry, composted portion are kept separate.
-
A fan circulates warm air under and around the compost for fast decomposition and evaporation of liquid. A float switch operates an additional bottom heater if excess liquid is detected. Once a week or as needed, mulch is added through the toilet seat opening to help the composting process.
-
Using energy efficient Swedish technology, electrical consumption is very low with an adjustable power setting. This setting is adjusted by you the user, according to the number of people you anticipate using the toilet. When you are away for more than two days, simply turn off your BioLet!
Easy to Clean and Maintain:
|
 |
Installation is Easy!
To successfully install a BioLet into your home, you will need the following:
-
Hole saw 55 mm (21 /4”) or jigsaw
-
Saw
-
Measuring tape
-
Asphalt sealant/adhesives
Also, check the floor space where the toilet should be placed so it is large enough. Required floor space is:
-
BioLet 15a and 25a width 55 cm (211 /2”) x length 110 cm (43”)
-
BioLet 65a width 65 cm (251 /2”)x length 135 cm (53”) (for the toilet and room for removal of the tray)
Installing the Vent Pipe:
-
The entire vent pipe, from the ceiling and up through cold areas such as attic, must be insulated. This is to prevent condensation in the ventilation pipe and to increase natural draught. Insulation is essential, no matter how much or little the toilet is used, even if the toilet is used only in summer.
-
Do not use bends more than 45°.
-
Do not use any rain cap on top of the ventialtion pipe, only use the included netting.
Connecting the Overflow Drain:
-
If you choose to connect the emergency overflow drain, choose one of the connectors (9), depending on the direction of the hose. There is a silicone plug in the connector, push the plug into the toilet and connect the hose.
Ensure the Right Room Temperature:
-
The room in which the toilet is installed must be insulated. When the toilet is in use, room temperature should be at least 18°C (65°F) to ensure proper function.
-
The best thing to do is to install a thermostatically controlled heating element.
-
During periods when the toilet is not in use the temperature in the room can be low or even freezing without any damage to the unit.
Ensure Adequate Air Supply:
-
To ensure adequate air supply, a vent through the outer wall should be installed. (100 mm (4”). No extractor fan in the toilet room to avoid back drought, which can lead to odors in the room.
Assembly Instructions:
-
Set the toilet in position against the wall. The floor must be even and insulated.
-
Measure and make a hole for the ventilation pipe in the ceiling, 55 mm (21 /4”) diameter. Install the ventilation pipe with the non-sleeved end down inside the rubber coupling on the toilet.
-
Measure and make a hole in the roof, with 55 mm (21 /4”) diameter.
-
Push the pipe up through the hole. Seal it well using asphalt sealant between the pipe and the roof to prevent any leaks.
-
Insulate the pipe from the ceiling up to the top. All pipework in cold spaces must be insulated.
-
Cut the exterior pipe to fit the angle of the roof.
-
Place the roof flashing on to the exterior pipe. (Use soapy water to make it easier). If you have a tin roof, the best thing to do is to get a sheet metal worker to make a junction between the roof and the exterior pipe.
-
Pass the exterior pipe over the ventilation pipe's insulation. Put on the reduction coupling.
-
Adjust the roof flashing and seal firmly with asphalt sealant between the roof flashing and the roof.
-
Fit the insect netting against the stop on the reducing coupling.
 |
 |
Starting an Empty BioLet Toilet:
-
Put about 2/3 of the bag of the BioLet humus starter into the toilet, except to model 65a where the whole bag should be used. About half of the material falls directly through the grate into humus tray.
-
Connect the plug into a grounded wall socket. Push down and release the seat. The mixer motor will automatically start and make one turn, repeat this a couple of times.
-
Set the heating control to the desired level. It's always recommended to start with setting #2.
BioLet 15a, 25a, and 65a:
BioLet Capacity Settings:
|

|
-
The recommended start setting for 2 people using the toilet is step 2.
-
After 1-2 weeks in operation, you might have to adjust the setting depending on the liquid level in the tube. If the tube is empty, decrease the setting and if the tube is more than half full increase the setting
Setting The BioLet Heater:
Set the heat according to usage, check the level tube on the right side (seen from the front).
-
Step 1 green light – Fan only
-
Step 2 yellow light (one LED) – fan and 30% heat.
-
Step 3 yellow light (two LEDs) – fan and 60% heat.
-
Step 4 yellow light (three LEDs) – fan and 100% heat
Operating your BioLet:
Checking the Level Tube:
|
 |
Adjusting too the perfect compost setting:
-
At the correct setting, the compost has a porous and moderately moist consistency. This is what you are looking for. If liquid gathers on the top of the compost and seeps into the tray slowly, then the compost is too wet and can no longer absorb the liquid as intended. To avoid this, increase the setting and add a few liters of humus starter. On the other hand, if hard lumps form or toilet paper remains on top, so that it doesn't get soaked and mixed in properly during mixing, the compost is too dry. To avoid this, turn the setting down and sprinkle a few liters of water over the compost to moisten it. If you have model 15a, make a couple of extra turns with the handle.
When to Empty the Compost:
-
In a cottage for example, with four to six weeks of use in a year, it is usually enough to empty the tray once. More frequent use and and more people using the toilet, you have to empty the tray more often. The general rule is to empty the tray when the compost level reaches the upper mixing arm. It will only take a few days after emptying, before the tray is filled and should stay full for composting until the next emptying of the tray is needed.
Maintaining your composting process with extra hummus starter:
-
To get the best compost, keep the compost porous and of moderately moist texture, add a little humus regularly, approximately one quart per person/week.
Seasonal Emptying during low use:
-
When and if your BioLet is not full when you are going away for the year, simply leave the compost in the toilet during the off season. The tray is then emptied next season once it is full. This will not harm the toilet or smell the room.
How to Empty the BioLet Tray:
A few days before emptying, increase the setting to 3 yellow lights. Once the liquid has disappeared from the level tube, do as follows:
-
Make sure there is no liquid in the level tubes on the right or left hand sides.
-
If there is still liquid, wait until the liquid has evaporated.
-
Disconnect the power.
-
Emptying: Remove the front cover and remove the tube from the tray.
-
Empty the tray.
-
Before you slide the tray back into place, check that the area where the tray goes is clean.
-
Replace the level tube and the front cover.
When to turn your BioLet off during non-use:
-
If you are away for more than two days, turn the power off, otherwise the compost will become hard and dry. If there is a lot of liquid, for example, after heavy use, you can leave the toilet running for a limited period (approximately one week). Leave the toilet running on the step 1 setting. Only the fan will run on this setting, and the contents of the tray will dry slowly.
Preparing your BioLet for the end of the season:
-
When the season is over and it is time to leave your cottage or off grid cabin, unplug the toilet and put the cover in the seat opening. You can also turn off the heat in the toilet room, as the BioLet does not freeze or break. You can leave the waste in the toilet until you return next season.


